
Perform an update
sudo apt update
sudo apt upgrade
Ensure we have both the “curl” and “lsb-release” packages
sudo apt install curl lsb-release
Adding the Cloudflare Repository on the Raspberry Pi
curl -L https://pkg.cloudflare.com/cloudflare-main.gpg | sudo tee /usr/share/keyrings/cloudflare-archive-keyring.gpg >/dev/null
echo "deb [signed-by=/usr/share/keyrings/cloudflare-archive-keyring.gpg] https://pkg.cloudflare.com/cloudflared $(lsb_release -cs) main" | sudo tee /etc/apt/sources.list.d/cloudflared.list
Run an update
sudo apt update
Installing Cloudfared to the Raspberry Pi
sudo apt install cloudflared
Create a tunnel
- Log in to Zero TrustOpen external link and go to Networks > Tunnels.
- Select Create a tunnel.
- Choose Cloudflared for the connector type and select Next.
- Enter a name for your tunnel. We suggest choosing a name that reflects the type of resources you want to connect through this tunnel (for example,
enterprise-VPC-01). - Select Save tunnel.
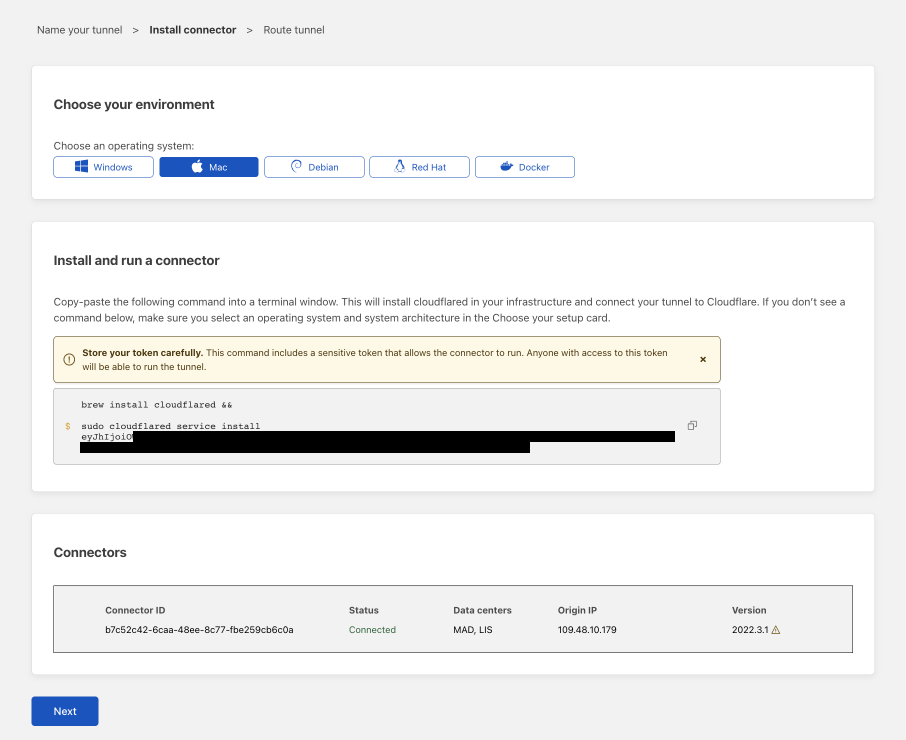
- Next, you will need to install
cloudflaredand run it. To do so, check that the environment under Choose an environment reflects the operating system on your machine, then copy the command in the box below and paste it into a terminal window. Run the command. - Once the command has finished running, your connector will appear in Zero Trust.
